Zigbee2MQTT is one of the most popular open-source projects in the smart home world. Instead of depending on proprietary hubs like the Philips Hue Bridge or Samsung SmartThings, Zigbee2MQTT gives you full control of your Zigbee devices through a simple USB coordinator and the MQTT protocol. With support for over 2,000 devices from hundreds of manufacturers, it's the ideal solution for anyone who wants an independent, reliable, and fully customizable Zigbee network. In this guide, we'll cover everything: from coordinator selection and installation, to device pairing, mesh network creation, and troubleshooting — updated for 2026.
📖 Read more: MQTT in Smart Home: What It Is, How It Works
What Is Zigbee2MQTT
Zigbee2MQTT is an open-source bridge software that converts Zigbee protocol messages into MQTT (Message Queuing Telemetry Transport) messages. In practice, this means every Zigbee device in your home — from temperature and motion sensors to bulbs, plugs, and locks — can be controlled via MQTT topics, without needing a proprietary hub.
The architecture is simple: a USB Zigbee coordinator (dongle) connects to your computer or Raspberry Pi, Zigbee2MQTT runs as a service and sends/receives data through an MQTT broker (usually Mosquitto). From there, you can connect the data with Home Assistant, Node-RED, openHAB, or any platform that supports MQTT.
The key advantages over proprietary hubs include: full local control without cloud dependency, support for devices from different manufacturers on the same network, OTA firmware update capability, detailed logging and debugging, and the ability to create specialized automations that wouldn't be possible with stock hubs. Zigbee2MQTT fully supports the Zigbee 3.0 standard and is compatible with older Zigbee devices (ZLL, ZHA).
"Zigbee2MQTT isn't just an alternative to proprietary hubs — it's the upgrade every smart home deserves. Full control, zero cloud dependency, and the largest compatibility list in the Zigbee ecosystem."
Supported Coordinators
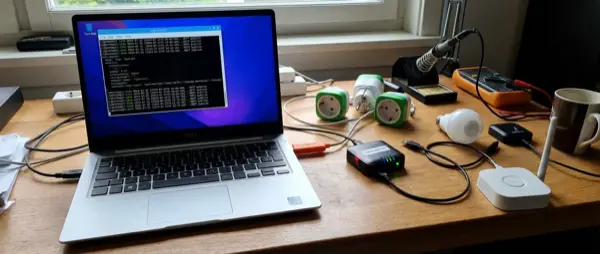
The Zigbee coordinator is the heart of your network — the USB device that communicates with all your Zigbee devices. Choosing the right coordinator is critical for network performance and reliability. Below is a detailed comparison table with the top choices for 2026:
| Coordinator | Chip | Range | Antenna | Connection | Price | Rating |
|---|---|---|---|---|---|---|
| Sgreverse ZBDongle-P | CC2652P | ~50m (indoor) | External SMA | USB | ~€18 | ⭐⭐⭐⭐⭐ |
| Sgreverse ZBDongle-E | EFR32MG21 | ~40m (indoor) | External SMA | USB | ~€18 | ⭐⭐⭐⭐⭐ |
| SLZB-06 | CC2652P | ~60m (indoor) | External SMA | Ethernet + USB + WiFi | ~€45 | ⭐⭐⭐⭐⭐ |
| Conbee III | EFR32MG21 | ~35m (indoor) | Built-in | USB | ~€35 | ⭐⭐⭐⭐ |
| TubeZB CC2652P2 | CC2652P2 | ~55m (indoor) | External SMA | USB + PoE (some) | ~€30 | ⭐⭐⭐⭐ |
| ITead ZB-GW04 | CC2652P | ~45m (indoor) | External | USB | ~€15 | ⭐⭐⭐⭐ |
For most users, the best-value choice remains the Sgreverse ZBDongle-E or ZBDongle-P. At under €20, they offer excellent range thanks to the external SMA antenna and full Zigbee2MQTT compatibility. If you need Ethernet connectivity (e.g., coordinator in a different room from your server), the SLZB-06 is an outstanding choice with triple connectivity (Ethernet, USB, WiFi). The Conbee III from the popular Dresden Elektronik line is a good alternative but falls behind due to its built-in antenna.
Installation on Home Assistant
Installing Zigbee2MQTT on Home Assistant is now extremely simple through the official add-on. Follow these steps:
Step 1: In Home Assistant, go to Settings → Add-ons → Add-on Store. Search for “Zigbee2MQTT” and install it. If it doesn't appear, first add the repository: https://github.com/zigbee2mqtt/hassio-zigbee2mqtt
Step 2: Before starting the add-on, you need to install the Mosquitto MQTT broker. Find it in the Add-on Store, install it, and create a dedicated user account (e.g., mqtt_user) in Settings → People → Users.
Step 3: Connect the USB coordinator to the Home Assistant host. Check the port via Settings → System → Hardware — typically it will be /dev/ttyUSB0 or /dev/ttyACM0.
📖 Read more: Raspberry Pi Smart Home: DIY Guide 2026
Step 4: Configure the settings. Open the Zigbee2MQTT add-on settings and configure the configuration.yaml file:
homeassistant: truepermit_join: falsemqtt:base_topic: zigbee2mqttserver: mqtt://core-mosquitto:1883user: mqtt_userpassword: your_secure_passwordserial:port: /dev/ttyUSB0adapter: zstackfrontend:port: 8080advanced:network_key: GENERATEpan_id: GENERATEchannel: 25last_seen: ISO_8601log_level: infohomeassistant_legacy_entity_attributes: falselegacy_api: falselegacy_availability_payload: falseAlternative via Docker: If you're not using Home Assistant OS but running Docker, you can install Zigbee2MQTT as a container. Create a docker-compose.yml:
version: '3.8'services:zigbee2mqtt:image: koenkk/zigbee2mqttcontainer_name: zigbee2mqttrestart: unless-stoppedvolumes:- ./zigbee2mqtt-data:/app/data
- /run/udev:/run/udev:ro
ports:- 8080:8080
environment:- TZ=Europe/Athens
devices:- /dev/ttyUSB0:/dev/ttyUSB0
📋 Installation Checklist
Before you begin, make sure you have:
- ✅ Supported USB Zigbee coordinator
- ✅ Home Assistant ≥ 2024.1 or Docker installed
- ✅ Mosquitto MQTT broker installed and configured
- ✅ USB extension cable (2-3m) to avoid USB 3.0 interference
- ✅ At least 2-3 Zigbee router devices (plugs, bulbs) for mesh network
- ✅ MQTT username/password noted down
MQTT Broker Connection
The MQTT broker is the intermediary communication node between Zigbee2MQTT and the rest of your applications. The most popular and reliable broker is Eclipse Mosquitto, which is lightweight, fast, and ideal for home automation.
After installing Mosquitto (either as a Home Assistant add-on or standalone), you need to configure the credentials. Create a mosquitto.conf file or use the add-on settings.
The MQTT topic structure in Zigbee2MQTT is hierarchical and logical. The base topic (default: zigbee2mqtt) serves as the root, and each device publishes to a sub-topic with its friendly name. For example:
# Device state (state topic)
zigbee2mqtt/living_room_sensor# Command to device (set topic)
zigbee2mqtt/office_light/set {"state": “ON”, "brightness": 200}# Bridge status
zigbee2mqtt/bridge/state# Enable pairing
zigbee2mqtt/bridge/request/permit_join {"value": true, "time": 120}# List connected devices
zigbee2mqtt/bridge/devices# Rename device
zigbee2mqtt/bridge/request/device/rename {"from": "0x00158d00″, "to": "kitchen_motion"}Each device automatically publishes its data (temperature, humidity, on/off state, battery level, etc.) in JSON format to the corresponding topic. This structure makes it incredibly easy to connect with any MQTT-compatible platform.
For security, always ensure you use authentication on the MQTT broker. Never leave the broker without a password, especially if your server is accessible from the local network. You can also enable TLS encryption for MQTT messages if additional security is required.
Device Pairing
The pairing process of a new Zigbee device in Zigbee2MQTT is simple but requires some attention. Follow these steps:
1. Enable Permit Join: In the Zigbee2MQTT frontend (http://hostname:8080), click the “Permit join (All)” button in the top right corner. This opens the network for new devices, typically for 120 seconds. Alternatively, send an MQTT message to the topic zigbee2mqtt/bridge/request/permit_join with payload {"value": true}.
2. Reset Device: Each Zigbee device must enter pairing mode. The method varies by manufacturer — usually you hold a button for 5-10 seconds, or do a quick power cycle (off-on) 5 times. Consult the device page on zigbee2mqtt.io for exact instructions.
📖 Read more: Water Leak Sensor Guide: Why You Need One in 2026
3. Interview Process: Once the device is found, Zigbee2MQTT performs an “interview” process where it discovers the device's capabilities (clusters, endpoints). This can take from 10 seconds to 2-3 minutes. Don't disconnect anything during this process.
4. Zigbee Channel Selection: A critically important point is choosing the correct Zigbee channel. Zigbee operates on the 2.4GHz frequency, where WiFi also operates. Channels 15, 20, and 25 have the least overlap with WiFi channels 1, 6, and 11. The Zigbee2MQTT default is channel 11, but we strongly recommend channel 25 which has minimal interference.
5. After Pairing: Immediately rename the device with a friendly name (e.g., “kitchen_motion” instead of “0x00158d00045e12ab”). This will make automations and organization easier. You can also assign the device to groups for simultaneous control.
Zigbee Network — Routers & Mesh
One of the biggest advantages of the Zigbee protocol compared to other technologies (e.g., Bluetooth, WiFi) is the ability to create a mesh network. In a mesh network, devices don't only communicate directly with the coordinator, but can use intermediate devices as “relays” to transmit messages.
In a Zigbee network, there are three types of devices:
Coordinator: The central node (your USB dongle). There's only one in each network. It manages network creation and maintenance, assigns addresses to devices, and maintains the routing table.
Routers: Devices permanently powered from mains electricity (plugs, bulbs, smart plugs). These extend the network range by relaying messages between the coordinator and remote devices. Each router can serve approximately 20-30 end devices. We recommend one router per room or per 10-15 meters.
End Devices: Battery-powered devices (sensors, remotes, thermometers). These don't relay messages — they send their data to the nearest router or coordinator and enter sleep mode to conserve energy.
In the Zigbee2MQTT frontend, you can view the Network Map — a graphical diagram showing how devices are connected to each other. This is extremely useful for identifying weak points in the network. If you see a device with low connection quality (LQI < 50), place a router near it.
For a reliable mesh network, follow these rules: place the coordinator centrally in your home, use at least 4-5 routers in an average home (80-120m²), avoid using smart bulbs as primary routers (they're not always reliable), and prefer smart plugs from IKEA, Sgreverse, or Aqara as dedicated routers — they cost €8-15 and are excellent.
Automations with Zigbee2MQTT
The true power of Zigbee2MQTT reveals itself in automations. Thanks to the MQTT protocol, you can create automations across multiple platforms:
📖 Read more: ESPHome: Build Your Own IoT Devices
Home Assistant Automations: With homeassistant: true enabled in the configuration, every Zigbee device automatically appears as an entity in Home Assistant. You can use device triggers, state conditions, and service calls for full automation. For example: if the kitchen motion sensor detects motion between 22:00-06:00, turn on the under-cabinet lights at 30% brightness.
Node-RED Integration: If you use Node-RED, the connection is trivial. Use the MQTT-in node to receive messages from any Zigbee topic, and the MQTT-out node to send commands. Node-RED's visual programming approach makes it easy to create complex flows — e.g., if temperature > 26°C AND someone is home AND it's between 14:00-18:00, activate the air conditioning.
MQTT Direct: For advanced users, you can send MQTT commands directly. Use tools like mosquitto_pub or MQTT Explorer:
mosquitto_pub -h localhost -u mqtt_user -P password \-t
zigbee2mqtt/office_light/set \-m '{"state": “ON”, "brightness": 254, "color_temp": 350}'
# Turn off all lights in a group
mosquitto_pub -h localhost -u mqtt_user -P password \-t
zigbee2mqtt/group_living_room/set \-m '{"state": "OFF"}'
# Request device status report
mosquitto_pub -h localhost -u mqtt_user -P password \-t
zigbee2mqtt/kitchen_sensor/get \-m '{"temperature": "", "humidity": "", "battery": ""}'
Some additional automation tips: use Zigbee groups instead of sending commands to each device individually (reduces network load), create availability checks to be notified if a device loses connection, and use device bindings for direct device-to-device communication (e.g., remote → lamp) without the command passing through the coordinator.
Troubleshooting
Despite its reliability, you may encounter some issues with the Zigbee network. Here are the most common causes and solutions:
WiFi 2.4GHz Interference: This is the number 1 cause of problems. Zigbee and WiFi share the 2.4GHz frequency. If you're using WiFi channel 1 (2.412GHz), avoid Zigbee channels 11-14. The optimal choice is Zigbee channel 25 with WiFi channel 1, or Zigbee channel 15 with WiFi channel 11. Alternatively, move WiFi clients to 5GHz where possible.
USB 3.0 Interference: USB 3.0 ports and cables emit significant interference in the 2.4GHz band. Always use a 2-3 meter USB extension cable to keep the coordinator away from the computer and USB 3.0 ports. This alone can dramatically improve performance.
Devices Dropping Off: If devices regularly lose their connection, check: (a) whether there are enough routers in the network, (b) battery level for end devices, (c) physical distance from the nearest router, (d) potential interference sources (microwaves, baby monitors). Also try force removing and re-pairing the device.
Firmware Updates: The coordinator needs up-to-date firmware. For Sgreverse dongles, use the cc2538-bsl tool or ZigStar GW Multi Tool for flashing. Regularly check for new firmware versions on your coordinator's GitHub repository. OTA updates for Zigbee devices can be done through the Zigbee2MQTT frontend (check for updates in the “OTA” tab).
Coordinator Placement: The coordinator should be centrally located, elevated (e.g., on top of a shelf), away from metal objects and electronic devices. Don't place it behind the TV or near the WiFi router.
🔧 Quick Troubleshooting Checklist
- 🔌 Use a USB extension cable (2-3m) for the coordinator
- 📡 Choose Zigbee channel 25 for minimal WiFi interference
- 🔄 Restart Zigbee2MQTT if something gets stuck
- 📊 Check the Network Map for weak connections (LQI < 50)
- 🔋 Replace batteries in sensors with low levels
- 🛡️ Update coordinator firmware and Zigbee2MQTT to latest versions
- 📍 Place smart plugs as routers at critical points
- ⚠️ Avoid locations near microwaves, baby monitors
Verdict
Zigbee2MQTT is, without a doubt, the top open-source solution for managing Zigbee devices in 2026. With over 2,000 supported devices, an active community of thousands of users, regular updates, and full integration with Home Assistant, it's the optimal choice for both beginners and advanced users.
Our coordinator recommendation: if you want the best value for money, go with the Sgreverse ZBDongle-E (~€18). If you want Ethernet connectivity for maximum placement flexibility, the SLZB-06 (~€45) is unbeatable. And if you already have a Conbee II/III, there's no reason to switch — Zigbee2MQTT fully supports them.
Start with 3-4 devices, gradually build your mesh network, and soon you'll have a reliable, fast, and fully local smart home network that doesn't depend on any cloud. Happy installing!