Why Smart Garden Lighting?
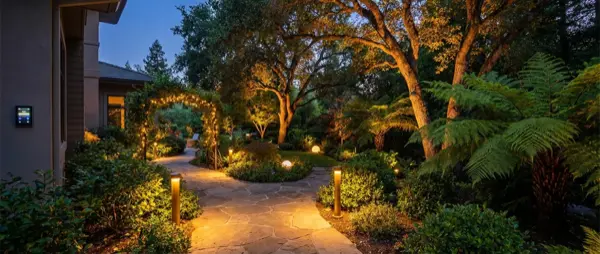
Smart garden lighting goes far beyond decoration. It boosts security (motion-activated lights deter intruders), extends garden use after dark, increases property value, and reduces electricity costs through solar panels and automations. With proper installation, your garden transforms into a stunning space every evening — automatically.
Categories of Smart Garden Lights
1. Solar Smart Lights
Solar smart lights are the easiest solution: stick them in the ground, connect to WiFi/Bluetooth, and they work without wires. They charge during the day and turn on automatically at night. Premium models (Ring Solar Pathlight, Philips Hue Outdoor Solar) offer 8-12 hours of runtime, RGB colors, and app control. Downside: brightness depends on sunshine hours — rarely a problem in Southern Europe.
2. Low-Voltage LED (12V/24V)
Low-voltage lights are the most popular choice for permanent installations. They require a transformer (230V→12V) but are safe for outdoor use and very economical on power. Ideal for pathway lights, tree uplighting, deck lighting, and water features. A smart controller (Zigbee/WiFi) manages zone dimming and timers.
3. Smart Floodlights
Smart floodlights (Ring, Eufy, Reolink) combine powerful lighting (2000-3000 lumen) with motion detection and cameras. They turn on automatically when motion is detected, record video, and send notifications to your phone. Ideal for entrances, garages, and perimeter security. The Ring Floodlight Cam Plus (€150) is the top pick in this category.
Top Products by Category
| Product | Type | Connection | Price | Rating |
|---|---|---|---|---|
| Philips Hue Lily | Spotlight | Zigbee | ~€100/each | ⭐ 9.5/10 |
| Ring Solar Pathlight | Solar Path | WiFi (Ring) | ~€35/each | ⭐ 8.5/10 |
| INNR Outdoor Spot | Spotlight | Zigbee | ~€50/each | ⭐ 8/10 |
| Ring Floodlight Cam | Floodlight+Cam | WiFi | ~€150 | ⭐ 9/10 |
| Govee Outdoor Strip | LED Strip | WiFi/BT | ~€60/10m | ⭐ 8/10 |
| Shelly RGBW2 | Controller | WiFi | ~€20 | ⭐ 9/10 |
Step-by-Step Installation Guide
Step 1: Planning
Plan your lighting layout before buying anything. Mark on a floor plan: pathways needing path lights, trees/plants for uplighting, walls for wash lighting, stairs for safety lights, and seating areas for ambient lighting. Rule of thumb: 3-4 types of lighting (path + accent + security + ambient) create a balanced result.
Step 2: Electrical Preparation
- Outdoor waterproof outlet: Install an IP65 outlet near the breaker panel — approx €30-50 including labor
- Transformer: For low-voltage LED, you need a 12V/24V waterproof transformer (IP67) — ~€25-40
- Cable: Outdoor rated cable in PVC conduit underground (minimum depth 30cm)
- Safety relay: 30mA RCD/RCCB at the breaker panel for outdoor circuits — mandatory in most EU countries
Step 3: Light Placement
- Path lights: Every 2-3 meters along pathways, 30-40cm height
- Spotlights: 30-50cm from tree/plant base, 15-30° angle
- Wall wash: 20-30cm from the wall, angled upward
- Deck lights: Recessed into decking boards, every 1-1.5m
- IP rating: Minimum IP44 for covered areas, IP65+ for exposed locations
Step 4: Smart Controller Setup
Connect lights to a smart controller. For Zigbee (Hue, INNR): pair via Hue Bridge or Zigbee2MQTT. For WiFi (Shelly, Govee): connect through the app and set up automations. Create zones (pathway, yard, pool, entrance) for independent control of each area.
Garden Automations
Automations are where the magic of smart garden lighting happens:
- Sunset trigger: Lights turn on automatically at sunset (±15 minutes) — correct time every day without manual adjustment
- Motion security: Floodlights at 100% + phone notification when motion detected after 11 PM
- Party mode: Voice command “Party” → RGB lighting, color cycling, music sync
- Dinner scene: “Dinner scene” → warm white 2700K at the table, dimmed path lights, spotlights off
- Vacation mode: Random on/off of garden lights at varying times — simulates presence
- Seasonal schedule: Summer: lights until 2 AM / Winter: lights until 11 PM — automatic switching
Installation Cost
| Solution | Small Garden (50m²) | Large Garden (200m²) |
|---|---|---|
| Solar DIY (basic) | €80-150 | €200-400 |
| Low-voltage smart | €200-400 | €500-1,000 |
| Premium (Hue Outdoor) | €400-700 | €1,000-2,500 |
| Electrician labor | €100-200 | €300-600 |
Common Mistakes
- Over-lighting: Light pollution — you don't need a football stadium. Subtle accent lighting is more elegant
- Wrong IP rating: An IP44 fixture in an exposed garden = short circuit in the first rain
- No zones: Everything on/off together — you can't create atmosphere
- Solar in shade: Solar fixtures under trees = half the brightness
- Climate considerations: Can the fixtures handle extreme heat or cold? Choose UV-resistant and heat-rated products
Conclusion
Smart garden lighting completely transforms your outdoor space and adds genuine value to your home. For a budget DIY setup, start with solar path lights (€80-150) and add gradually over time. For a premium result, Philips Hue Lily spotlights with a Zigbee controller deliver pro-level quality that rivals professional landscape lighting installations. Pay attention to IP ratings for weather resistance, ensure proper wiring meets local electrical codes, and create separate lighting zones for maximum flexibility and atmosphere control. Consider combining solar path lights for walkways with wired spotlights for accent trees and smart floodlights for security coverage. With the right automations, your garden will be perfectly lit every evening without ever touching a switch — and your electricity bill will thank you for using efficient LED technology paired with smart scheduling.