Drone aerial photography has fundamentally changed how we see the world. Shots that a decade ago required a helicopter and thousands of euros worth of equipment are now achievable with a sub-1kg drone that fits in your backpack. In this comprehensive guide, you'll learn everything — from proper camera settings to composition techniques, ideal lighting conditions, and the best drones for photography in 2026.
Why Drone Aerial Photography?
Modern photography drones offer capabilities that were unthinkable at this price point just a few years ago. The 1/1.3-inch sensor found in models like the DJI Mini 4 Pro and DJI Air 3 captures 48MP images in RAW format, while 4K video recording at 60fps with HDR means you have cinematic quality in your pocket. Flight time reaches up to 46 minutes (DJI Air 3), range extends to 20 kilometers via O4 transmission, and obstacle avoidance happens automatically with omnidirectional sensing.
Camera Settings for Drone Photography
Proper camera settings are the foundation of every great aerial photograph. One critical point experts emphasize is that you should always shoot in RAW format, not JPEG. RAW stores far more data, particularly in shadows and highlights — crucial for aerial photos that often have extreme dynamic range. Additionally, with RAW you can adjust white balance after the shot, which is impossible with JPEG.
Shoot in RAW
Enable RAW (or RAW+JPEG) in your camera settings. The 48MP RAW files give enormous post-processing freedom — you can recover detail in shadows and highlights that JPEG would have permanently lost.
Keep ISO Low
Keep ISO at 100-200 whenever possible. Drone sensors are smaller than full-frame, so noise appears earlier. With the 1/1.3″ Dual Native ISO sensors, you can push to ISO 400 without issues.
Shutter Speed
For photography, use at least 1/500 sec or faster to avoid motion blur. For video, follow the 180° rule — shutter speed = 2× framerate (e.g., 1/50 for 24fps).
Color Profile: D-Log M & HLG
For maximum dynamic range in video, use D-Log M (10-bit) which delivers 12+ stops. For quick use without color grading, HLG (Hybrid Log-Gamma) is ideal — vivid colors straight out of the camera.
Settings Table by Scenario
| Scenario | ISO | Shutter | Aperture | Format |
|---|---|---|---|---|
| 🌅 Golden Hour Landscape | 100 | 1/250 - 1/500 | f/2.8 | RAW |
| ☀️ Midday (Bright) | 100 | 1/1000+ | f/2.8 + ND | RAW |
| 🎬 Video 4K/24fps | 100-200 | 1/50 | f/2.8 + ND | D-Log M |
| 🌊 Long Exposure | 100 | 1-4 sec | f/2.8 + ND1000 | RAW |
| 🌙 Blue Hour / Night | 400-800 | 1/30 - 1 sec | f/1.7 | RAW |
| 🏠 Real Estate | 100-200 | 1/500 | f/2.8 | RAW + HDR |
Composition in Aerial Photography
Composition from the air is entirely different from ground-level photography. As expert photographers at Shotkit point out, drones reveal geometric shapes, symmetry patterns, and color contrasts that are invisible at eye level. Here are the 6 essential techniques:
Rule of Thirds
Enable the grid overlay in the DJI Fly app. Place key elements at the intersection points — coastlines, roads, or buildings. This is the foundation of every strong composition.
Leading Lines
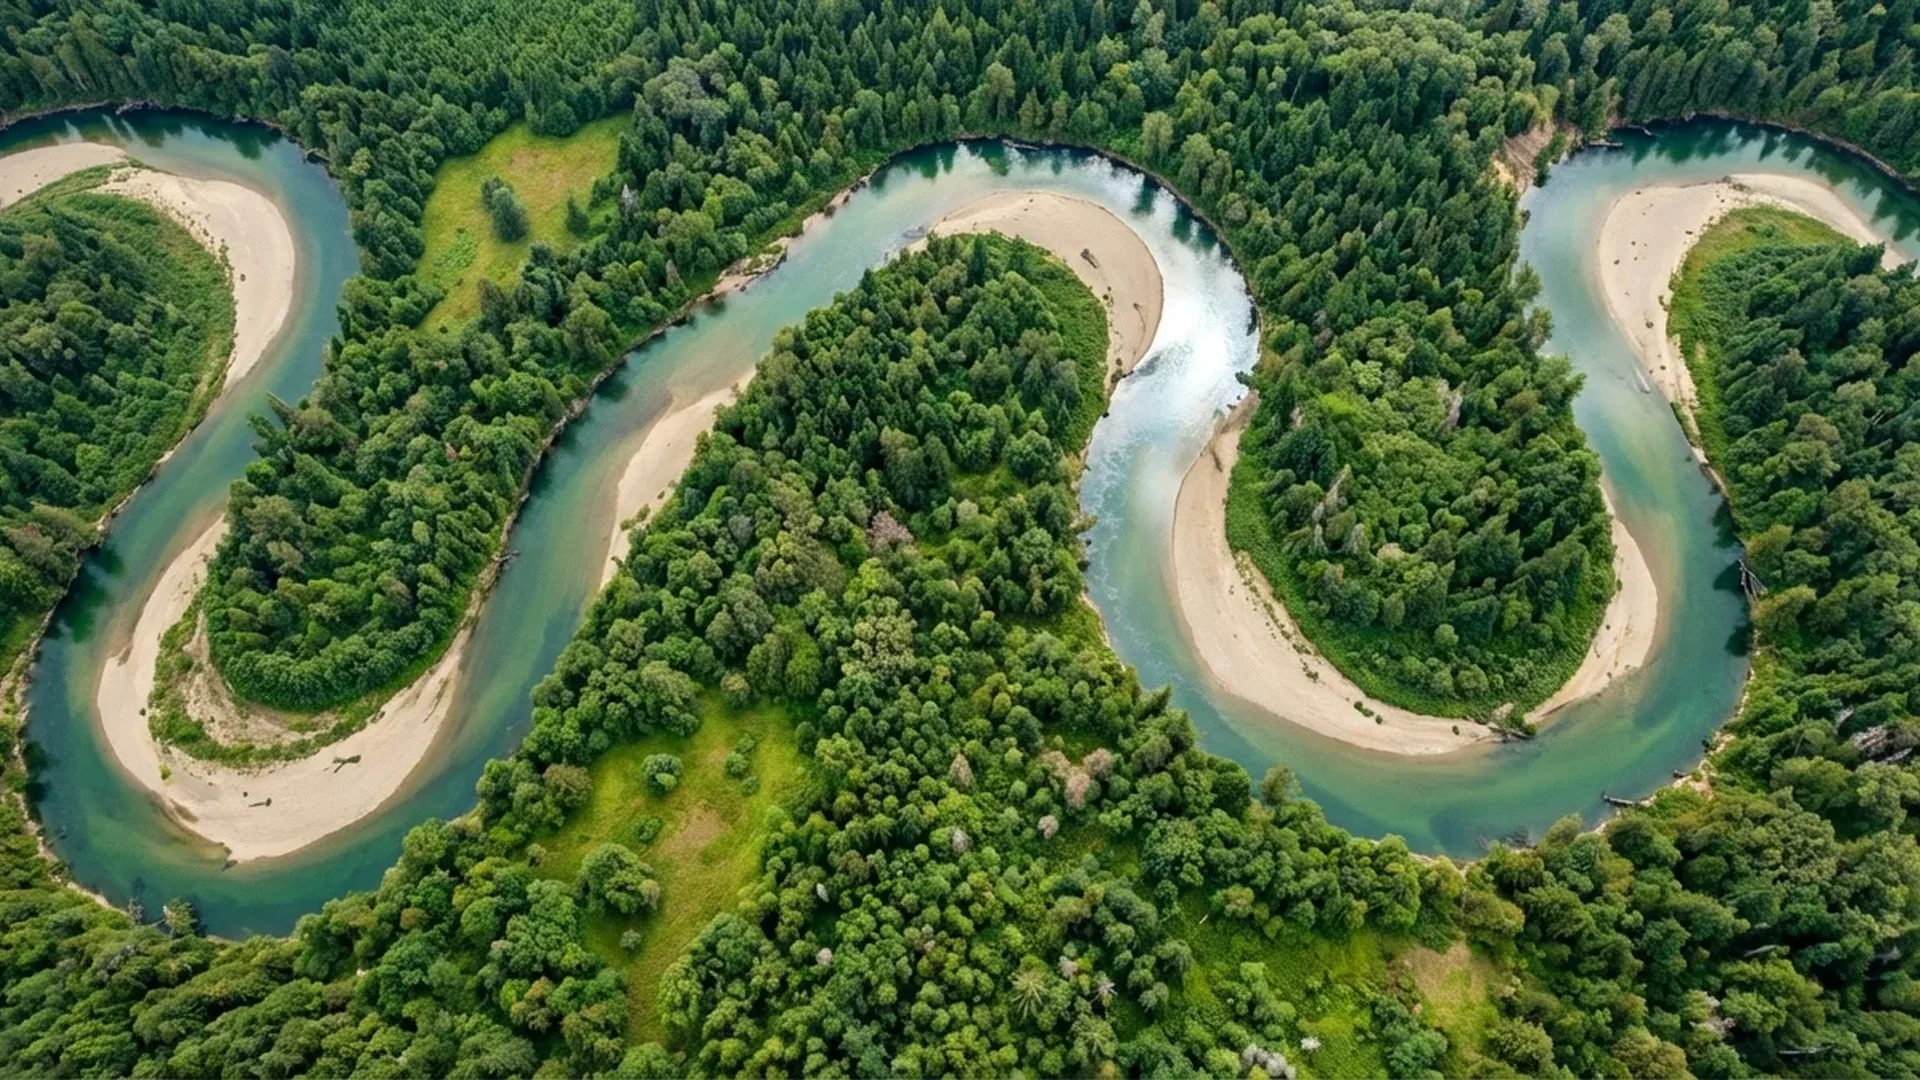
Roads, rivers, tree shadows, coastlines — use lines that guide the viewer's eye through the image. From above, leading lines are far more prominent and powerful.
Patterns & Symmetry
Agricultural fields, architectural complexes, marinas with boats — the top-down angle reveals repeating patterns that create stunning abstract compositions.
Color Contrast
Look for color contrasts: turquoise water next to white sand, green forest beside brown rocks. Aerial photography transforms landscapes into a living color palette.
Top-Down / Bird's Eye View
The vertical shot (90°) is a drone-exclusive capability. It creates “cartographic” images where scale is lost and the result resembles abstract art.
Scale & Reference
Add a human element for scale — a hiker on a trail, a car on a road. This gives a sense of size and makes the photograph dramatically more impactful.
💡 Pro Tip — Google Earth Scouting: Before you fly, use Google Earth to find interesting locations and angles. The top-down view closely resembles what you'll see from your drone — you can plan your shots in advance and maximize your flight time.
Lighting — When to Fly
Lighting is the single most important factor in aerial photography. As experts emphasize, morning and evening are by far the best times — the sun is low, creating long shadows, warm colors, and dramatic light.
Golden Hour
The first hour after sunrise and the last before sunset. Warm, golden light with long shadows that give depth to landscapes. Ideal for coastlines, mountains, and scenic vistas.
Blue Hour
20-30 minutes before sunrise or after sunset. The sky turns deep blue, ideal for cities with illuminated buildings. Requires slower shutter speed and stable hovering.
Overcast
Clouds act as a natural softbox — even light without harsh shadows. Excellent for architecture, real estate photography, and property videography.
Midday — When to Avoid
The midday sun creates harsh shadows and washes out colors. Exception: top-down photography works well because shadows disappear vertically beneath subjects.
"Morning and evening hours aren't just 'better' — they're the reason some drone photos stand out and others look mediocre. Plan your flights around the light."
ND Filters — The Essential Accessory
ND (Neutral Density) filters reduce the amount of light reaching the sensor without altering colors. They're essential for video (to maintain the 180° rule) and extremely useful for long exposure photography.
Video — Essential
Without ND in bright conditions, shutter speed will be too fast (1/2000+), creating an undesirable staccato effect. With ND16 or ND32 you keep shutter at proper levels (1/50 for 24fps).
Long Exposure
With ND1000 you can achieve 1-4 second shutter speeds even in daylight. Ideal for “silky” water, moving clouds, and light trails from cars at night.
Cost & Selection
An ND filter set (ND8/ND16/ND32/ND64) for DJI Mini 4 Pro or Air 3 costs approximately €45-60 (~$49-65). Variable ND filters cost under €100 (~$109) and offer greater field flexibility.
Best Drones for Photography (2026)
Your drone choice depends on your needs — portability, image quality, or lens versatility. Here are the top 3 picks, all featuring 1/1.3″ sensors and 48MP resolution:
DJI Mini 4 Pro — Best for Beginners
Under 249 grams — no registration required in many countries. 1/1.3″ sensor with f/1.7, 48MP RAW, 4K/60fps HDR, 4K/100fps slow-motion, 10-bit D-Log M/HLG. Omnidirectional sensing, ActiveTrack 360°, 34-minute flight time. Price: approximately €700 (~$759) (base) or €900 (~$979) (Fly More Combo).
DJI Air 3 — Dual Camera Power
Two 1/1.3″ cameras — wide 24mm f/1.7 and 3x telephoto 70mm f/2.8, both 48MP. 4K/60fps HDR, D-Log M, 46-minute flight (48% more than Air 2S), O4 20km, omnidirectional sensing, APAS 5.0, ActiveTrack 5.0 in 8 directions. Price: approximately €1,010 (~$1,099) (base) or €1,240 (~$1,349) (Fly More RC-N2).
DJI Mavic 3 Pro — Triple Camera Pro
Three cameras: Hasselblad 4/3″ 20MP (24mm), 1/1.3″ 48MP medium tele (70mm), and 1/2″ 12MP tele (166mm). Top-tier image quality, 43-minute flight, Apple ProRes support. For serious photographers and professionals. Price: approximately €2,020 (~$2,199).
🎯 Which Drone for Beginners? The DJI Mini 4 Pro is the top choice. Under 249g (easier regulations), excellent 48MP image quality, omnidirectional sensing for safety, and priced at approximately €700 (~$759). If you want zoom and professional capabilities, go for the Air 3.
Pre-Flight Checklist
A proper checklist before every flight saves you from mistakes and ensures you maximize your time in the air. Here are the 6 essential steps:
Batteries
Charge all batteries to 100%. Always bring at least 2-3 batteries. With the Fly More Combo, 3 batteries give you over 1.5 hours of total flight time.
microSD Card
Use a V30 or UHS-I card with at least 128GB. A 256GB card (approximately €30 / ~$33) holds thousands of RAW photos and hours of 4K video.
Weather Conditions
Check wind, rain, and temperature. Don't fly in wind exceeding 2/3 of the drone's maximum speed. Drones are not waterproof — even humidity can cause problems.
Location & No-Fly Zones
Use the DJI Fly app or AirMap to check if your location is in a restricted zone. Near airports, military areas, and archaeological sites, flying is prohibited.
Lens Cleaning
Clean the lens before every flight. A fingerprint or dust speck won't show on screen but will ruin your images. Use a microfiber cloth and keep silica gel in your carry case.
Firmware Update
Update firmware at home, not in the field. An update can take 15-20 minutes and leave you without your drone during golden hour. Always check 1-2 days in advance.
Automated Shooting Techniques
Modern drones offer automated functions that produce impressive results even without experience. Take advantage of them:
Panorama
Automatic multi-image capture and stitching. Supports 180° Panorama, Wide Angle, Vertical, and Sphere modes. Ideal for landscapes with massive field of view — resolution can exceed 100+ MP.
Hyperlapse
Automatic time-lapse while the drone moves. Create cinematic hyperlapse videos of a scene — ideal for sunsets, nighttime cities, and traffic flow.
ActiveTrack 360°
Automatic tracking of a moving subject. On the DJI Air 3, ActiveTrack 5.0 works in 8 directions with automatic obstacle avoidance. Ideal for athletes, vehicles, and hiking.
QuickShots
Pre-programmed cinematic shots: Dronie, Helix, Rocket, Circle, Boomerang, Asteroid. Select your subject, press GO, and the drone does everything automatically.
Post-Processing: After the Flight
Editing is half the result in aerial photography. RAW files look flat and muted — that's normal, because they contain maximum information. This is where the magic happens:
💻 Desktop Software
- Adobe Lightroom Classic — The king of RAW editing, with excellent lens profiles for DJI drones
- Luminar Neo — AI-powered, automatic sky and landscape enhancement
- DaVinci Resolve (Free) — Top-tier color grading for D-Log M video
📱 Mobile Editing
- DJI LightCut — Automatic AI editing with direct drone import
- Lightroom Mobile — Full RAW editing on mobile with cloud sync
- Snapseed (Free) — Excellent free tool by Google
6-Step Aerial Photography Editing Workflow
- Lens Correction — Enable lens correction (profile-based or manual). Removes barrel distortion common in wide-angle drone cameras.
- White Balance — Set the correct color temperature. For golden hour, go warmer (5500-6500K).
- Exposure & Contrast — Pull highlights to -20/-30, push shadows to +40/+60. Add subtle contrast.
- Colors & Saturation — Boost vibrance (not saturation) by +15/+25. Use the HSL panel for targeted adjustments.
- Sharpening & Noise — Sharpening +50/+70 (Amount) with masking +40 to sharpen only edges. Luminance noise reduction if ISO > 400.
- Crop & Straighten — Straighten the horizon (critical in aerial photos) and crop for stronger composition.
The 6 Most Common Beginner Mistakes
Avoid these mistakes from the start and you'll progress much faster:
Only Using Auto Mode
Learn Manual or at least Shutter Priority (S). Auto mode gives acceptable results but never exceptional — it can't “understand” your creative intent.
High ISO
ISO above 400-800 on a 1/1.3″ sensor produces visible noise. Use slower shutter speed or wider aperture instead of pushing ISO higher.
Fast Flight = Blurry Photos
Come to a complete hover before shooting. Even slight movement at 48MP resolution creates motion blur. Use Tripod Mode for slow, precise movements.
Ignoring Regulations
Flying without knowing the rules can mean fines or equipment confiscation. In most EU countries, registration with the aviation authority is mandatory for any drone, regardless of weight.
JPEG Instead of RAW
JPEG discards data permanently. Especially in aerial photos with high dynamic range (dark ground, bright sky), RAW gives you 3-4 extra stops of recoverable information.
No ND Filters for Video
Video without ND in bright conditions looks “staccato” and non-cinematic. An ND set costs €45-60 (~$49-65) and makes an enormous difference in your footage quality.
Top Destinations for Drone Photography
From Mediterranean coastlines to mountain gorges, certain destinations offer endless opportunities for aerial photography:
Coastal & Island Locations
Greek islands (Santorini sunset over Caldera, Milos white rocks + turquoise water, Zakynthos Shipwreck Beach), Croatian coast (Dubrovnik), Italian Amalfi Coast. Watch for wind — especially summer sea breezes around islands.
Mountains & Gorges
Meteora monasteries on rock pillars (unique top-down angle), Vikos Gorge (deepest proportionally in the world), Swiss Alps, Norwegian fjords. Many archaeological sites prohibit drones — always check ahead.
Cities
Barcelona, Thessaloniki (Waterfront, White Tower — blue hour), Dubai, Singapore. In urban environments, strictly follow local flight regulations and no-fly zones.
Practice — Simulator & First Flights
Before flying in beautiful locations, practice in a simulator. DJI Flight Simulator offers a realistic experience where you can practice manual mode, cinematic shots, and emergency responses — without any risk. Additionally, Velocidrone (approximately €18 / ~$20) is excellent for FPV practice.
On your first real flights, use Tripod Mode which limits speed to ~3.6 km/h. You can fly slowly, steadily, and precisely — ideal for photography and learning. Gradually, you'll build confidence for more complex shots and maneuvers.
Equipment Cost Breakdown
How much does drone aerial photography cost? Less than you think:
Total for a complete beginner setup: approximately €980 (~$1,065) (Fly More + ND + microSD). This gets you 48MP RAW / 4K HDR / omnidirectional sensing equipment that would have cost four times as much just 5 years ago.
Frequently Asked Questions
What's the best drone for photography beginners?
The DJI Mini 4 Pro (approximately €700 / ~$759). Under 249g, 1/1.3″ 48MP sensor, omnidirectional sensing, ActiveTrack 360°, and priced to leave budget for accessories. If you want a zoom lens, the Air 3 (approximately €1,010 / ~$1,099) offers dual cameras at 24mm + 70mm.
Do I need ND filters?
For video, yes — they're essential. For photography, useful but not critical. An ND8/ND16/ND32/ND64 set costs approximately €45-60 (~$49-65) and will make a massive difference in quality.
JPEG or RAW?
Always RAW (or RAW+JPEG for quick preview). RAW stores far more information, particularly in shadows and highlights. You can adjust white balance, exposure, and colors after the shot with zero quality loss.
What are the best times to fly?
Golden hour (first/last hour of sunlight) for landscapes. Blue hour (20-30 minutes before/after) for cities. Overcast for real estate. Avoid midday unless doing top-down photography.
Do I need a license to fly in the EU?
Yes. Every drone operator must register with their national aviation authority regardless of drone weight. For drones under 250g in Open/A1 category, the process is relatively straightforward. Flying over crowds, near airports, and over protected sites is prohibited.